
Essential Steps: How To Treat A Cut Pad On A Dog Safely
A cut pad on a dog can be scary, but with the right steps, you can help your furry friend heal well. To treat a cut pad on a dog, you first need to stop any bleeding. Then, clean the wound carefully. After that, put on a clean bandage. It is also very important to know when a cut is too deep or serious and needs a vet to look at it. Minor cuts often heal at home, but deep ones need professional care.
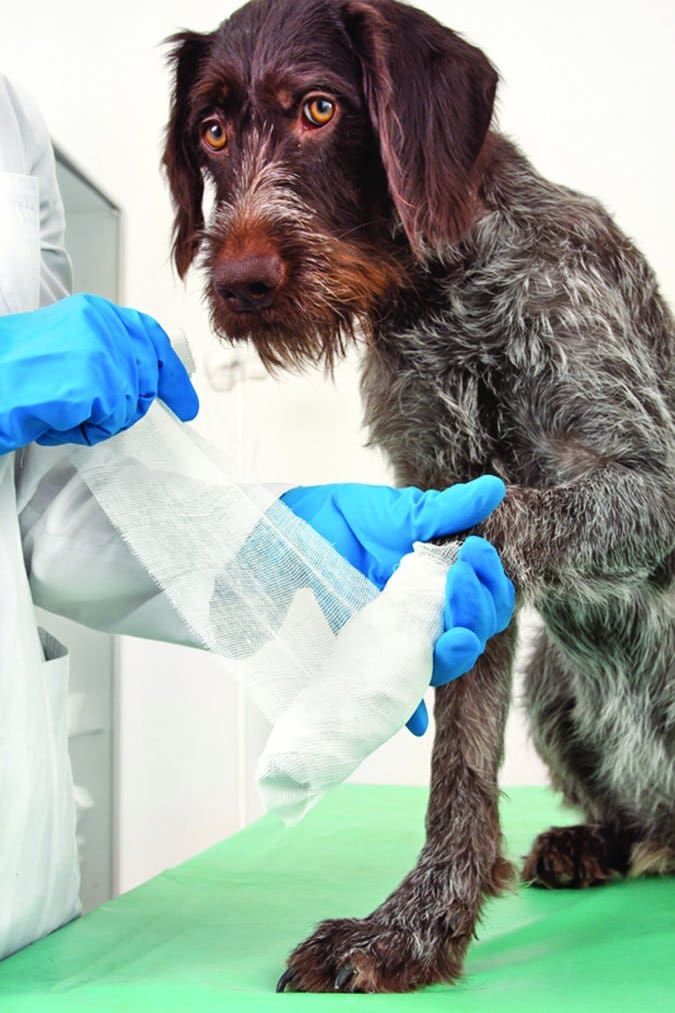
Image Source: www.whole-dog-journal.com
Immediate Actions When Your Dog Cuts Its Paw
Finding your dog with a cut paw pad can be upsetting. Your quick actions are key to helping your dog. Stay calm. This will help your dog stay calm too.
Assessing the Injury
First, look closely at your dog’s paw. Gently spread their toes to see the full wound.
* Is it a small scrape or a deeper cut?
* Can you see bone or tendon? This means it is very serious.
* Are there any foreign objects stuck in the paw, like glass or thorns?
* How much is it bleeding? A little ooze is different from blood gushing out.
* Is your dog in a lot of pain? Are they limping badly? (dog limping after paw injury)
Your dog’s paw pads are tough. But they have many blood vessels. This means even small cuts can bleed a lot. If the cut is very deep or large, or if it has a foreign object, get ready for a trip to the vet.
Stopping the Bleeding
This is the very first step in bleeding paw pad first aid. Quick action here can prevent more problems.
1. Apply Direct Pressure: Use a clean cloth, gauze, or even a paper towel. Press it firmly onto the cut. Hold it there for at least 5 to 10 minutes. Do not peek. Keep the pressure steady.
2. Elevate the Paw: If you can, gently raise your dog’s paw above their heart. This can help slow blood flow.
3. What if it Won’t Stop? If the bleeding does not slow down or stop after 10 to 15 minutes of firm pressure, you must go to the vet right away. This kind of bleeding is a sign of a serious injury.
Cleaning the Wound
Once the bleeding is under control, the next step is cleaning a dog’s paw injury. This helps prevent infection.
1. Gather Supplies:
* Warm water (clean)
* Mild, pet-safe soap (like a gentle dish soap, but better to use an antiseptic if you have one)
* Clean cloths or gauze pads
* Tweezers (clean, for removing small bits)
* Pet-safe antiseptic solution (like dilute povidone-iodine or chlorhexidine. Do NOT use alcohol or hydrogen peroxide, as these can hurt the tissue.)
2. Flush the Wound: Gently rinse the cut with warm water. You can use a clean syringe (without the needle) or a squeeze bottle to gently squirt water into the wound. This helps wash out dirt and debris.
3. Remove Debris: If you see small bits of dirt, glass, or gravel, try to gently pick them out with clean tweezers. If anything is stuck deep or hard to remove, do not force it. Let the vet handle it. Trying to dig it out can make the wound worse.
4. Use Antiseptic: After flushing, apply a pet-safe antiseptic for dog paw cuts. Dilute povidone-iodine (Betadine) to a weak tea color with water is a good choice. Chlorhexidine solution (Hibiclens) can also be used, diluted as directed. Gently wipe around and into the wound. Again, avoid harsh chemicals like rubbing alcohol or hydrogen peroxide. They can damage new tissue.
Bandaging a Dog’s Paw
After cleaning, bandaging is a key step in dog paw wound care. A good bandage protects the cut from dirt and germs. It also keeps your dog from licking it. Bandaging a dog’s paw can be tricky. It needs to be snug but not too tight.
What You Need
- Non-stick pad: This goes directly over the cut. It prevents the bandage from sticking to the wound. (e.g., Telfa pad)
- Gauze roll: This adds padding and absorbs any ooze.
- Self-adhesive bandage: This is the outer layer that holds everything in place. (e.g., Vetrap, Co-Flex). This kind of bandage sticks to itself, not to fur.
- Medical tape: To secure the top and bottom of the bandage.
- Scissors: For cutting the bandage materials.
Step-by-Step Guide for Bandaging a Paw
- Apply Non-Stick Pad: Place the non-stick pad directly over the clean cut. Make sure it covers the whole wound.
- Add Gauze Padding: Wrap the gauze roll around the paw. Start below the paw pads and wrap up over the toes. Go between the toes gently to prevent rubbing. You want a soft, even layer. Do not wrap too tight. You should be able to slip two fingers under the bandage easily.
- Apply Self-Adhesive Bandage (Vetrap):
- Start below the paw pads, just above them.
- Wrap around the paw, covering the gauze.
- Make sure to include the two middle toes. Leave the outer two toes (dewclaws if present) uncovered slightly to check for swelling. Or cover them fully if they are small. The key is to check for swelling later.
- Wrap up the leg a few inches, making sure the bandage covers the lower leg. This helps keep the bandage from slipping down.
- Overlap each layer by about half.
- Do not pull too tight! This is the most common mistake. A bandage that is too tight can cut off blood flow. This can cause more damage than the cut itself.
- Secure with Tape: Use medical tape to secure the top and bottom edges of the self-adhesive bandage to your dog’s fur. This helps stop dirt from getting in. It also keeps the bandage from sliding down.
- Check for Tightness: After you finish, try to slip two fingers easily under the top edge of the bandage. If you cannot, it is too tight. Take it off and re-do it. Also, check your dog’s paw pads. They should be their normal color, not swollen, cold, or discolored.
Important Tips for Bandaging
- Change Daily: You must change the bandage every day, or more often if it gets wet or dirty. This lets you check the wound.
- Keep it Dry: Water will make the bandage dirty and can lead to infection. Put a plastic bag or a special dog bootie over the bandage when your dog goes outside. Take it off once they are back inside.
- Watch for Swelling: Check your dog’s paw often, especially the exposed toes. If they look swollen, cold, or discolored, the bandage is too tight. Remove it right away and re-bandage more loosely, or go to the vet.
- Prevent Licking: Dogs will often try to lick or chew at bandages. This can cause more problems. An Elizabethan collar (e-collar or “cone of shame”) might be needed to stop them.
When to Seek Veterinary Care
Not all paw cuts can be treated at home. Knowing when to get veterinary care for deep paw cuts is very important.
| Situation | Action |
|---|---|
| Deep cut, wide open | Go to the vet. The wound may need stitches to close properly. Stitches prevent infection and help heal faster. |
| Bleeding won’t stop | Go to the vet. If applying pressure for 10-15 minutes does not stop the bleeding, a deeper blood vessel may be cut. |
| Paw looks deformed or dog cannot put weight on it | Go to the vet immediately. This could mean a broken bone, dislocated joint, or severe tendon damage. |
| Foreign object stuck deep | Go to the vet. Do not try to pull it out yourself. It could cause more bleeding or damage. |
| Injury from a bite or puncture | Go to the vet. These wounds often look small but can be very deep and carry a high risk of infection. Your dog may need antibiotics or other care. |
| Dog is in great pain | Go to the vet. Severe pain means a serious injury. Your vet can give pain relief and find the problem. |
| Small scrape, minor bleeding that stops | Home care possible, but watch it closely. |
| Limping that gets worse | Go to the vet. If your dog’s limping (dog limping after paw injury) gets worse or doesn’t improve, something serious might be going on. |
A vet can properly clean deep wounds, remove deeply embedded objects, and stitch cuts. They can also give antibiotics to fight infection or pain medicine to help your dog feel better.
Ongoing Dog Paw Wound Care and Recovery
Once the initial first aid is done, proper ongoing dog paw wound care is vital for healing. This includes checking for infection and protecting the wound.
Monitoring for Infection
Even with the best care, infections can happen. It is important to know dog paw infection symptoms so you can act fast. Look for these signs every time you change the bandage:
* Redness: The skin around the wound looks much redder than normal.
* Swelling: The paw or skin around the cut looks puffy or bigger than normal.
* Pus: You see thick, colored discharge (white, yellow, green) coming from the wound.
* Bad Smell: The wound has a foul or strange odor.
* Pain: Your dog cries out, snaps, or pulls away when you touch the paw. They may also be licking the wound a lot.
* Fever: Your dog might feel warm, act tired, or not want to eat.
* Limping More: If your dog’s limping (dog limping after paw injury) gets worse instead of better, it could be a sign of infection or other problems.
If you see any of these signs, call your vet right away. Infection can make healing much slower and can cause more serious health problems.
Keeping the Wound Clean and Dry
Protecting dog paw wounds from dirt and moisture is key for healing.
* Waterproof Bootie: When your dog goes outside, put a waterproof bootie or a plastic bag over the bandage. This stops the bandage from getting wet or dirty. Take it off as soon as they come back inside. This lets air get to the wound.
* E-Collar (Cone): Dogs naturally want to lick their wounds. Licking can open the wound, remove medicine, and cause infection. An e-collar (Elizabethan collar or “cone of shame”) stops your dog from reaching the paw. Most dogs do not like the cone at first, but it is very important for healing.
* Limit Exercise: During the healing time, your dog should not run, jump, or play too much. Leash walks are okay, but short and careful. Too much activity can re-open the wound or make healing take longer.
Managing Healing Time
Healing time for dog paw pads can vary a lot. It depends on how deep the cut is and how well it is cared for.
* Minor cuts: Small scrapes might heal in 1 to 2 weeks.
* Deeper cuts: These can take 2 to 4 weeks or even longer. Cuts that need stitches might heal on the outside quickly, but the deeper tissues take more time.
* Patience is Key: Healing is a process. Do not rush it. Follow your vet’s instructions. Keep the wound clean and protected. Do not stop care just because the wound looks closed. The new skin is still fragile.
* Keep Checking: Even after the bandage comes off, watch the paw closely for any signs of trouble. The paw pad skin can take time to get back to its full toughness.
Preventing Paw Pad Injuries
The best way to treat a paw pad cut is to prevent it from happening.
* Check Paws Regularly: Get in the habit of looking at your dog’s paws daily. Check for cuts, cracks, thorns, or anything stuck between their toes.
* Avoid Hot Surfaces: Hot pavement, asphalt, or sand can burn your dog’s paw pads. In summer, walk your dog in the early morning or late evening when it is cooler. If you cannot hold your hand on the ground for 5 seconds, it is too hot for your dog’s paws.
* Watch Out for Sharp Objects: Be careful where you walk your dog. Avoid areas with broken glass, sharp rocks, or metal debris.
* Use Paw Balms: Special paw balms can help keep your dog’s pads soft and healthy. This makes them less likely to crack or get dry, which can lead to cuts.
* Trim Nails: Long nails can change how your dog walks. This can put more stress on the paw pads and make them more prone to injury. Keep nails trimmed.
Grasping the Importance of Quick Action
Knowing what to do when your dog cuts its paw is a very important skill for any dog owner. Acting fast can stop bleeding, prevent infection, and greatly speed up healing. A simple cut can become a serious problem if not cared for quickly and correctly. Always remember to stay calm. Assess the wound, stop the bleeding, clean it, and bandage it. If you have any doubt, or if the wound looks serious, do not hesitate to call your vet. Your quick and careful action makes a huge difference in your dog’s comfort and recovery.
Frequently Asked Questions (FAQ)
Q: Can my dog walk with a cut paw?
A: For small cuts, short, careful walks on a leash are usually okay, but avoid running or jumping. For deeper cuts, your dog should rest as much as possible to help the paw heal faster. Too much movement can reopen the wound.
Q: How often should I change the bandage?
A: You should change the bandage every day. If the bandage gets wet or dirty, change it right away. Changing it daily lets you check the wound for signs of infection and make sure it is healing well.
Q: What if my dog licks the wound or bandage?
A: Licking is a common problem. It can lead to infection or cause the wound to open up again. You will likely need to use an Elizabethan collar (e-collar or “cone of shame”) to stop your dog from licking or chewing the paw or bandage.
Q: Can I use human antiseptic on my dog’s paw?
A: Many human antiseptics are too harsh for dogs. Do NOT use rubbing alcohol or hydrogen peroxide. These can hurt healthy tissue and slow healing. Stick to pet-safe options like diluted povidone-iodine (Betadine) or chlorhexidine solution, as recommended by your vet.
Q: How do I know if the wound is healing?
A: You will see less redness and swelling. The wound edges will start to close. New pink tissue will form. There should be no pus or bad smell. As it heals, a scab may form and then fall off. The limping should get better each day.