The “heel” command means your dog walks right beside you. Your dog’s shoulder should be even with your leg. It is a key part of dog obedience commands. Yes, you can teach an old dog new tricks, including heel. Age does not stop learning for dogs. Heel training makes walks fun and safe for both of you. It is a core dog walking skill.
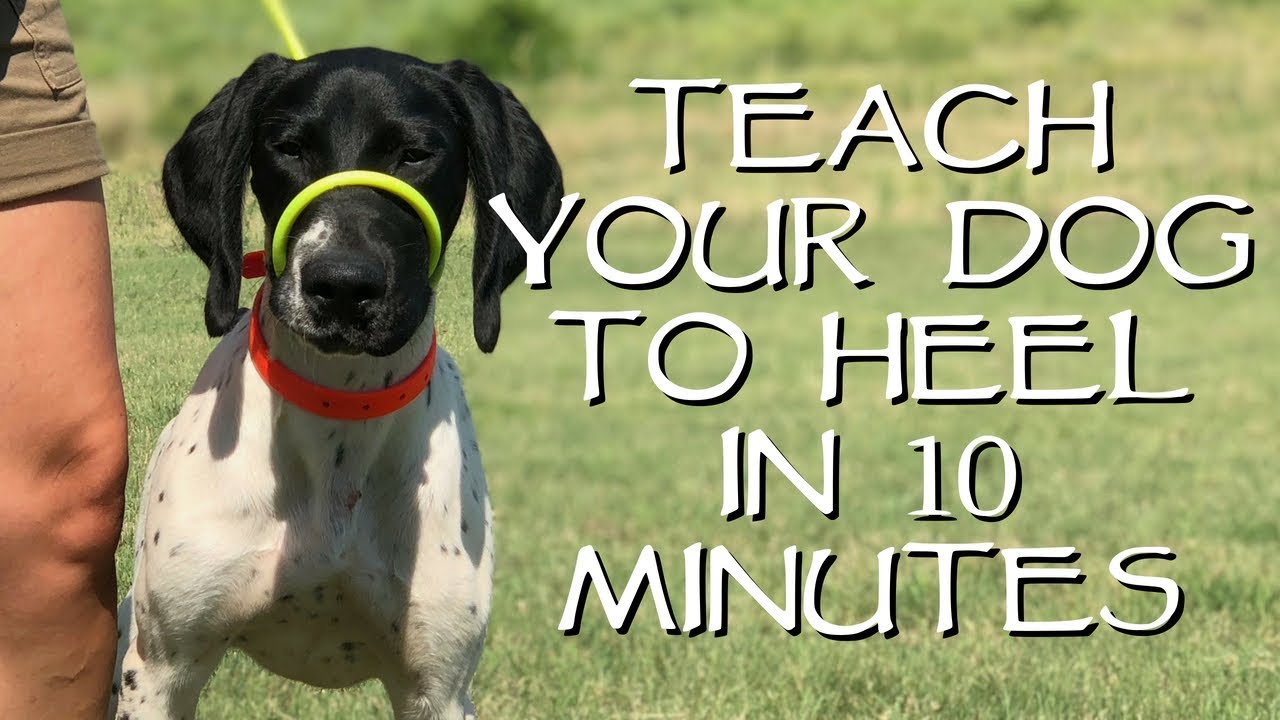
Image Source: i.ytimg.com
Why Heel Matters for Every Dog
Teaching your dog to heel changes your walks. No more pulling. No more struggling. It brings calm and joy to your outings. Heel work is more than just a trick. It makes your dog safer. It helps you control your dog in busy places. This command helps you connect better with your dog.
Grasping the Power of Heel
Heel training helps solve many common dog problems. It stops your dog from pulling on the leash. This is a big win for loose leash walking. It keeps your dog close when you need them to be. This is important near roads or other dogs. Heel helps your dog focus on you. It builds their trust in you as a leader.
- Safety First: A dog at heel is safe. They stay away from dangers.
- Better Control: You can guide your dog easily.
- Stronger Bond: Working together builds trust. It shows your dog you are a team.
- Less Stress: Walks become fun, not a fight. This helps stop dog pulling.
- Freedom: A well-behaved dog can go more places with you.
What You Need to Get Started
Before you begin, gather your supplies. Having the right tools makes training easier. You do not need fancy gear. Simple things work best for leash training tips.
Essential Training Gear
| Item | Why You Need It |
|---|---|
| High-Value Treats | Small, soft, and yummy. Your dog loves them. |
| Clicker | An optional tool. Helps mark good behavior fast. |
| Standard Leash | 6-foot length is good. Not a retractable one. |
| Flat Collar or Harness | Choose one your dog wears well. Not a choke chain. |
| Quiet Training Spot | Start in a place with few things to distract. |
| Patience and Joy | The best tools. Keep training fun and positive. |
Deciphering the Proper Heel Position
The heel position is clear. Your dog’s shoulder should be next to your leg. Their nose should be at your knee. They should be walking in step with you. This is the proper heel position. This means they move when you move. They stop when you stop.
Defining the Heel Spot
Imagine a line from your leg to your dog’s shoulder. This line should stay even. Your dog should be close. Not too close to trip you. Not too far to pull away. This is the sweet spot. It is a very clear spot. Your dog needs to know exactly where it is.
- Left Side: Traditionally, heel is taught on the left side.
- Close Contact: Your dog’s body should lightly touch your leg.
- Looking Up: Your dog should look at you often. They check in with you.
- Loose Leash: The leash should hang loose. No pulling.
Starting with Loose Leash Walking
Before your dog can heel, they need to walk on a loose leash. This is a basic dog walking skill. If your dog pulls all the time, heel training will be hard. Teach them that a loose leash means good things. A tight leash means you stop.
Steps to Achieve Loose Leash Walking
- Start in a Quiet Place: Pick a spot with no people or other dogs.
- Hold Leash Right: Hold the leash with a gentle loop. Your hand should be relaxed.
- Treating Good Behavior: When your dog walks beside you and the leash is loose, give a treat. Say “Yes!” or click.
- Stop When Pulling: If your dog pulls, stop walking. Stand still. Wait until the leash is loose again. Then start walking.
- Change Direction: If your dog goes too far ahead, turn around and walk the other way. This makes them pay attention.
- Practice Short Bursts: Do not train for too long. Short, fun sessions are best.
Remember, this takes time. Be consistent. Every walk is a chance to practice.
Teaching the Heel Command: Step-by-Step
Now that your dog knows about loose leash walking, you can teach the “heel” command. This uses positive reinforcement training. It means you reward good choices. Never punish bad ones.
Step 1: Luring into Position
Start in a quiet place. Have your treats ready.
- Get Ready: Stand straight. Your dog is in front of you.
- Lure: Hold a treat near your dog’s nose. Move the treat slowly to your side. Guide your dog so their shoulder is next to your leg. This is the proper heel position.
- Mark and Reward: As soon as your dog is in the right spot, say “Yes!” or click. Give the treat.
- Repeat: Do this a few times. Make it quick and fun. Do not add the word “heel” yet. You want your dog to love the position first.
Step 2: Adding the “Heel” Word
When your dog moves to the heel spot easily with the lure, add the command.
- Give Command: As you start to lure your dog into the heel position, say “Heel.”
- Lure, Mark, Reward: Guide them into place. Say “Yes!” or click. Give the treat.
- Fade the Lure: Slowly make the hand motion smaller. You want your dog to move into heel just by hearing the word.
- Practice: Do this many times. Keep sessions short.
Step 3: Taking a Step
Now, your dog can get into heel. Teach them to stay there for one step.
- Heel Position: Get your dog into the heel position. Say “Heel.”
- Take One Step: Take one step forward with your preferred foot (usually the left).
- Mark and Reward: If your dog stays in heel, say “Yes!” or click. Give a treat.
- Repeat and Add Steps: Slowly add more steps. Two steps, then three. Always reward when they stay in position.
- Stop and Reward: Stop often and give a treat. This teaches them that stopping at your side is also part of heel.
Step 4: Adding Turns and Stops
Dogs need to heel even when you change direction or stop.
- Turns: While heeling, make a slight turn. If your dog stays with you, mark and reward. Practice right turns, left turns, and U-turns.
- Stops: While heeling, stop walking. If your dog stops next to you, mark and reward. This teaches them to stop in the proper heel position.
- Different Speeds: Practice at a normal walk. Then try a slow walk. Try a fast walk. Always reward being in position.
Positive Reinforcement Training: The Key
Positive reinforcement training is the best way to teach. It means you add something good (like a treat or praise) when your dog does something right. This makes them want to do it again.
Why It Works So Well
- Builds Trust: Your dog sees you as a source of good things.
- Clearer Learning: Your dog knows exactly what they did right.
- Fun for All: Training becomes a game, not a chore.
- Lasting Results: Dogs learn faster and remember longer.
Tips for Effective Positive Reinforcement
- Timing is Everything: Give the treat within 1-2 seconds of the good action.
- Use High-Value Treats: Treats your dog really loves.
- Vary Rewards: Sometimes a treat, sometimes praise, sometimes a toy.
- Keep it Fun: Stay happy and positive. Your dog feels your mood.
- End on a High Note: Finish training sessions with success.
From Puppy to Off-Leash: Gradual Progression
Teaching a puppy heel command is often easier. They are blank slates. But the steps are the same for dogs of any age. The key is to go slowly.
Starting with a Puppy
Puppies have short attention spans. Keep sessions very short. Five minutes is often enough. Use lots of small, tasty treats. Puppies learn fast. They also get tired fast. Focus on making it a happy game. This builds good dog walking skills early on.
Adding Distractions
Once your dog heels well in a quiet place, slowly add distractions.
- Mild Distractions: Train near a parked car. Or a quiet park bench.
- Moderate Distractions: Train near other people. Train near a dog far away.
- High Distractions: Train near other dogs. Train in a busy park.
Always start easy. If your dog struggles, go back to an easier step. Success is key.
Moving Towards Off-Leash Heeling
Off-leash heeling is an advanced goal. Do not try this until your dog has a perfect heel on a leash. They must also have a strong recall command.
- Long Line: Start with a long training line (15-30 feet). This gives you control.
- Quiet Area: Pick a safe, fenced area with no distractions.
- Practice: Do all the same steps you did on a short leash. Walk, stop, turn.
- Fade the Line: Slowly let the line drag. Then, eventually, remove it.
- Always Carry Leash: Even when practicing off-leash, carry your leash. You might need it.
- Proofing: Practice in many different places. This makes the heel strong everywhere.
Addressing Common Challenges
Teaching heel can have bumps. Do not get sad if your dog struggles. Many dogs face similar issues. Staying calm helps.
My Dog Pulls Ahead
This is very common. It means your dog is eager.
- Solution: Go back to the “Stop When Pulling” rule. Every time they pull, stop. Do not move forward until the leash is loose. If they pull to the side, turn the other way. This teaches them: “Pulling stops the walk. Loose leash means we go.”
- Treating: Reward heavily when the leash is loose for even a second.
- Faster Turns: Make sudden turns. This keeps your dog guessing and paying attention.
My Dog Lags Behind
Some dogs walk too slow or sniff too much.
- Solution: Use happy talk and encouragement. “Let’s go! Good boy!” If they fall too far behind, gently tug the leash and praise when they catch up.
- Reward: Give treats often when they are in the proper heel position. This makes staying beside you more rewarding than sniffing.
- Check for Issues: Make sure your dog is not tired or hurting.
My Dog is Distracted
Other dogs, people, smells, or sounds can break focus.
- Solution: Start training in a very quiet place. Slowly add small distractions.
- Treat Value: Use really high-value treats for distractions. The treat needs to be better than the distraction.
- “Watch Me” Command: Teach your dog to look at you. “Watch me!” and reward. Practice this often. Then use it when a distraction comes.
- Short Sessions: End before your dog gets too distracted or frustrated.
My Dog Nips at the Leash or Jumps
This often means your dog is over-excited or frustrated.
- Solution: Stop all forward movement. Wait for calm. Do not interact while they are biting the leash or jumping. When they are calm, reward.
- More Exercise: Make sure your dog gets enough playtime before training. A tired dog learns better.
- Chew Toy: Bring a favorite toy for a quick chew break if they get too excited.
Refining Your Dog’s Heel: Advanced Tips
Once your dog heels well, you can make it even better. These tips add polish to their dog walking skills.
Varying Reinforcement
You do not need to give a treat every single time.
- Intermittent Reinforcement: Give treats sometimes, but not always. This makes your dog try harder. They never know when the big reward is coming.
- Life Rewards: Use things your dog loves as rewards. “Good heel! Now you can go sniff that tree!” or “Good heel! Here’s your favorite toy!”
Adding Hand Signals
You can teach heel with a hand signal. This is great for off-leash heeling.
- Pair: As you say “Heel,” make a small hand motion (e.g., tap your leg).
- Practice: Do this every time you say “Heel.”
- Fade Voice: Slowly make the voice command quieter. Soon, your dog will heel with just the hand signal.
The “Automatic Sit”
This is a neat trick. When you stop, your dog automatically sits at your side.
- Practice Heel and Stop: Get your dog to heel, then stop.
- Lure to Sit: As you stop, lure your dog into a sit beside you.
- Mark and Reward: Say “Yes!” or click, then treat.
- Repeat: After many times, your dog will sit without the lure.
Table of Common Heel Training Issues and Solutions
| Problem | Possible Cause | Solution |
|---|---|---|
| Dog pulls forward | High excitement, no clear rules | Stop-and-go method, sudden turns |
| Dog lags behind | Distracted, low motivation, tired | High-value treats, cheerful voice, check health |
| Dog sniffs ground | Distractions, self-rewarding | “Leave It” command, higher value for heeling |
| Dog breaks heel | Too many distractions, not proofed enough | Reduce distractions, practice more, build focus |
| Dog gets frustrated | Sessions too long, too hard | Keep sessions short and fun, end on success |
Maintaining and Practicing Heel Skills
Teaching heel is just the start. You need to practice regularly. This keeps the skill sharp. It helps your dog remember. It also makes your walks more fun.
Daily Practice
- Short Bursts: Do not need long training sessions. A few minutes every day is better than one long session once a week.
- Incorporate into Walks: Every walk is a training chance. Ask for heel for short bits. Then let your dog sniff. Then ask for heel again.
- Different Places: Practice in many different places. This helps generalize the command.
- Family Involvement: Make sure everyone in your family uses the same commands and rules. This helps your dog learn faster.
Troubleshooting & Refining
- Go Back a Step: If your dog struggles, go back to an easier stage. This is normal.
- Problem Solve: What is making it hard? Is it the place? The time of day? Your dog’s mood?
- Be Patient: Learning takes time. Some dogs learn faster than others. Never get angry.
- Seek Help: If you are really stuck, a professional dog trainer can help.
Conclusion: Enjoy Your Walks
Teaching your dog to heel is a rewarding journey. It gives you a dog that walks politely. It ends the struggle of stop dog pulling. It builds dog obedience commands and strong dog walking skills. It creates a happy, calm walk experience. Remember positive reinforcement training and patience. With regular practice, you will transform your walks. Enjoy your time with your well-heeled dog!
Frequently Asked Questions (FAQ)
H3. How long does it take to teach a dog to heel?
It depends on the dog and how often you practice. Some dogs learn the basics in a few weeks. It can take months to get a perfect, distraction-proof heel. Be patient and consistent.
H3. Can I teach heel to an older dog?
Yes! You absolutely can teach an older dog to heel. Older dogs might learn a bit slower than puppies, but they can still learn well. Use the same positive reinforcement training methods.
H3. What if my dog keeps pulling even after training?
Go back to basics. Revisit loose leash walking skills. Stop every time they pull. Make sure your treats are high-value. Practice in very low-distraction areas first. Consistency is key to stop dog pulling.
H3. Should I use a harness or a collar for heel training?
A flat collar or a front-clip harness works best for teaching heel. A front-clip harness can help stop dog pulling by turning your dog around when they pull. Avoid retractable leashes, choke chains, or prong collars.
H3. When can I start off-leash heeling?
Only start off-leash heeling after your dog has a perfect, reliable heel on a regular leash in many places. Your dog also needs a very strong recall command. Start in a safe, fenced area.
H3. My dog is good at home but pulls outside. Why?
Outside has many more distractions. Your dog’s focus is split. This is normal. Go back to basics in a slightly distracting area. Slowly add more distractions. Make sure your rewards are more exciting than the outside world. This is called “proofing” the command.