
Image Source: usvintagewood.com
How To Protect Hardwood Floors From Dog Urine Guide
Can dog urine ruin hardwood floors? Yes, it can badly damage them. Dog urine leaves ugly dark spots and a strong smell. It can even make the wood warp. The best way to protect hardwood floors from dog urine is a mix of quick cleaning, proper sealing, and good training. You can prevent dog pee stains on wood by acting fast. This guide will help you keep your floors safe.
Grasping Why Dog Urine Harms Hardwood Floors
Dog urine causes real problems for wood floors. It has many bad things in it. These include urea, ammonia, and salts. Uric acid is also there. These parts work together to harm your floors.
Why Urine Attacks Wood
- Color Changes: Urine makes dark spots on wood. This happens fast. It can turn black if not cleaned right away. The color changes are ugly. They happen because the chemicals in urine react with the wood. This also happens with the finish. The dark spots can go very deep into the wood.
- Strong Smells: Urine leaves a very bad smell. The smell comes from bacteria and uric acid. This smell can last for a long time. It sinks deep into the wood. The crystals of uric acid stay in the wood. They release a stronger smell when it is humid. This makes the odor hard to remove.
- Finish Damage: Urine eats away at the finish on your floor. It can make the finish bubble or peel. This lets the urine get into the wood itself. Once the finish is broken, the wood is open to damage. The acid in urine can dissolve some finishes. This removes the protective layer.
- Wood Damage: Urine can make wood swell. This makes the boards warp or cup. It can also weaken the wood. This makes the floor look bad. If the urine stays wet, it can cause mold to grow. This adds to the smell and makes the wood even weaker. Over time, wood can start to rot. This means you might need to replace whole boards.
Proactive Steps to Protect Your Floors
It is always better to stop a problem before it starts. This is true for dog urine and wood floors. A few simple steps can save your floors. These steps include training your dog. They also involve sealing your floors.
Training Your Dog for Hardwood Floor Accidents
Good training is your first line of defense. Training your dog helps stop accidents. A well-trained dog will go outside. This keeps your floors safe. Think of this as the main way to prevent issues.
- Crate Training: A crate can help a lot. Dogs do not like to soil their sleeping space. This teaches them to hold it. Then they learn to go outside. Use the crate for short times at first. Make it a safe and comfy place.
- Regular Potty Breaks: Take your dog out often. Do this especially after waking up and after meals. Puppies need to go out very often. A general rule is every 2-4 hours for puppies. For adult dogs, take them out first thing in the morning. Take them out before bed. And take them out often during the day.
- Positive Reinforcement: Give treats and praise when your dog pees outside. Make it a happy event. This teaches them where to go. Never punish them for accidents inside. This can make them hide their mistakes. This makes cleaning harder.
- Supervision: Watch your dog inside. If they start to sniff or circle, take them out fast. Stop accidents before they happen. If you cannot watch them, put them in their crate. Or keep them in a safe area without wood floors.
- Dealing with Accidents: If an accident happens, do not scold your dog. Just clean it quickly. This is part of training dogs for hardwood floor accidents. A calm reaction is best. They will learn over time.
Choosing the Right Floor Finish
The finish on your floor protects the wood. Some finishes are better than others. A good finish can help with preventing dog pee stains on wood. It makes the floor more resistant to liquids. This protective layer is your floor’s first shield.
Here are common types of floor finishes:
- Polyurethane: This is a common and good choice. It forms a hard, clear layer.
- Oil-based polyurethane: This finish is tough. It adds a warm, amber glow to the wood. It is very durable. But it takes a long time to dry. It can smell strong for days. This can be a good choice for busy homes.
- Water-based polyurethane: This dries fast. It has less smell. It is also very durable. This is often a top pick for a hardwood floor urine resistant finish. It stays clear and does not yellow over time. It helps a lot with sealing hardwood floors from pet accidents. It is also more eco-friendly.
- Acid-cured finish (Swedish finish): This is very strong. It resists wear very well. But it is very toxic when applied. It needs professionals to put it on. It has a very strong smell. It also takes a long time to fully cure.
- Moisture-cured urethane: This is also very tough. It handles moisture well. It is a good choice for waterproofing hardwood floors pet urine. It cures quickly in humid air. It has a very strong odor during application.
- Penetrating oil finish: These soak into the wood. They give a natural, matte look. But they offer less surface protection. Urine can soak in more easily. They need more upkeep. They might need re-oiling more often.
Look for a finish that is durable and water-resistant. This is a key part of waterproofing hardwood floors pet urine. A thicker finish layer generally gives more protection.
Here is a quick look at common floor finishes for homes with pets:
| Finish Type | Pros | Cons | Pet Friendliness Rating |
|---|---|---|---|
| Oil-Based Polyurethane | Very tough, classic warm look | Slow dry time, strong odor, yellows over time | Good |
| Water-Based Polyurethane | Dries fast, low odor, clear look, durable | Might need more coats, slightly less abrasion resistance than oil | Very Good |
| Acid-Cured Finish (Swedish) | Extremely tough, very resistant to wear/moisture | Very toxic to apply, needs pros, high VOCs | Excellent (once cured) |
| Moisture-Cured Urethane | Highly durable, excellent moisture resistance | Strong odor during application, reacts to humidity | Excellent (once cured) |
| Penetrating Oil | Natural feel, easy spot repair, eco-friendly | Less surface protection, absorbs stains more easily | Lower (needs more upkeep and quick cleanup) |
Applying a Protective Sealant
A sealant adds another layer of defense. This is different from the top finish. A sealant makes the wood less porous. This means liquids soak in less. A good sealant is key for sealing hardwood floors from pet accidents. It creates an extra barrier below the final finish.
Types of Sealants:
- Urethane sealers: These work well under polyurethane finishes. They add a good base layer. They improve adhesion.
- Epoxy sealers: These are very tough. They form a strong barrier. They offer good waterproofing hardwood floors pet urine. They are often used in commercial settings. Some home-use versions exist.
- Acrylic sealers: These are often used for quick drying. They offer decent protection. They are usually water-based. They are easy to apply.
How to Apply Sealant (General Steps):
- Prepare the Floor: Make sure the floor is very clean and dry. Remove all dust and dirt.
- Sand Lightly: Lightly sand the floor if needed. Use fine-grit sandpaper (e.g., 220-grit). This helps the sealant stick better. Clean off all sanding dust.
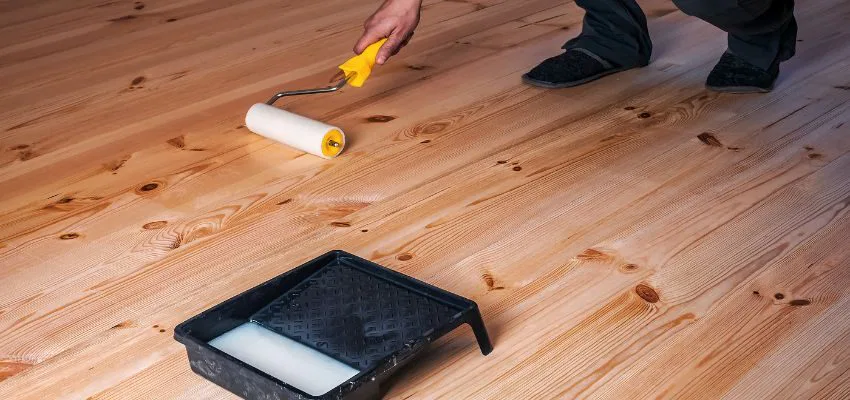
- Apply Evenly: Use a roller or brush. Put on thin, even coats. Avoid puddles. Work in small sections.
- Dry Time: Let each coat dry fully. Follow the product instructions. This drying time is very important for proper curing.
- Add Topcoat: Apply your chosen top finish after the sealant. The sealant is a base coat. It is not the final layer.
Choosing the best floor sealant for pets means looking for one that repels water well. It should also be durable. Look for products that state “moisture barrier” or “water blocking.” Talk to a floor expert if you are unsure. They can guide you to the right product for your wood type.
Swift Action: Cleaning Accidents Immediately
Time is very important when a dog pees on your wood floor. The faster you clean it, the less damage it will do. Urine starts to soak in right away. Every second counts.
Tools You Will Need
Have these items ready in a handy place:
* Many sheets of paper towels or old, absorbent cloths
* Gloves (to protect your hands from urine and cleaners)
* A plastic bag (for soiled towels and waste)
* An enzymatic cleaner (more on this later, keep it easily reachable)
* A small brush or scrub pad (soft, non-scratch, for tough spots later)
* A clean bucket with water
* A fan (to help dry the area faster)
Steps for Immediate Cleanup
- Blot, Do Not Rub: The first thing to do is soak up the urine. Use many layers of paper towels. Press down firmly. Do not rub the spot. Rubbing can spread the urine. It can also push it deeper into the wood grain. Keep blotting until no more wetness comes up. Use fresh paper towels for each blot.
- Rinse Lightly: After blotting up most of the liquid, take a damp cloth. Make it just wet with clean water. Wring it out very well. Wipe the spot lightly. This helps lift more urine from the surface. Then blot dry again with fresh paper towels. The goal is to remove as much urine as possible. Avoid using too much water.
- Apply Cleaner: Once the area is mostly dry, spray an enzymatic cleaner. Make sure it is safe for hardwood floors. Spray enough to cover the whole spot. If the urine spread, spray a larger area.
- Let It Work: Follow the cleaner’s directions carefully. Most enzymatic cleaners need time to work. They need to sit for 10-15 minutes or longer. This lets the enzymes do their job. They break down the uric acid and other urine components. For stronger smells, you might need to cover the area. Use a damp cloth or plastic wrap. This stops the cleaner from drying too fast.
- Wipe Clean and Dry: After the time is up, wipe the area clean. Use a clean, damp cloth. Then dry the spot completely. Use a clean, dry cloth or paper towels. You want no moisture left. You can use a fan to speed up drying. Ensure the area is completely dry before walking on it.
This quick action is key for preventing dog pee stains on wood. It stops the urine from sinking deep.
Removing Odor and Stains: A Deeper Clean
Sometimes, accidents are not caught right away. Or the smell remains even after a quick cleanup. This is where special cleaners come in. You need to address both the stain and the smell. This part is about dog urine odor removal hardwood.
Why Enzymatic Cleaners Are Best
- How They Work: Enzymatic cleaner for dog urine wood is very good. These cleaners have special “good” bacteria. These bacteria make enzymes. The enzymes eat up the bad stuff in urine. They break down uric acid crystals. These crystals cause the strong smell. Other cleaners might just cover the smell. Enzymes remove the source of the smell.
- Benefits:
- They remove odor, not just cover it up. They actually break down the odor-causing molecules.
- They work on old stains too. The enzymes reactivate with moisture. This lets them tackle old, dried urine.
- They are safe for pets and people when used right. They do not contain harsh chemicals.
- They are usually safe for wood floors. Always check the label. Make sure it says “safe for sealed wood floors” or “hardwood safe.”
How to Use Enzymatic Cleaners Correctly
- Clean the Area: First, remove all visible urine. Blot it up as described before. For old stains, clean the surface dust.
- Apply Generously: Pour or spray the cleaner onto the stain. Make sure it soaks into the wood. If the urine went deep, the cleaner needs to go deep too. You want the cleaner to reach all the urine.
- Allow Dwell Time: This is very important. Let the cleaner sit. The longer it sits (within product limits), the better it works. Some products say hours. Some say to cover the spot with a damp cloth or plastic wrap. This stops it from drying too fast. It keeps the enzymes active. Follow the specific product’s instructions for the best results.
- Blot and Dry: After the recommended time, blot up any extra cleaner. Do not rinse the area with water. Then let the area air dry completely. The enzymes keep working as it dries. You might need to do this more than once for old or strong smells. Be patient. Drying can take 1-2 days for very deep saturation.
Other Odor Removal Methods (Use with Caution)
- Baking Soda: For light smells, sprinkle baking soda on the dry stain. Let it sit for hours or overnight. Then vacuum it up. Baking soda absorbs odors. It is a mild way to refresh an area. It won’t remove deep odors.
- White Vinegar Solution: Mix equal parts white vinegar and water. Use this on fresh stains after blotting. Vinegar neutralizes ammonia. But be careful. Too much vinegar or leaving it on too long can harm your finish. It can also strip wax finishes. Always test in a hidden spot first.
- Hydrogen Peroxide (3%): Use with extreme care. Peroxide can lighten wood. It can also harm finishes. Only use on very dark, old stains. Apply a small amount with a cotton swab. Watch it closely. If it starts to lighten too much, wipe it off fast. Rinse and dry quickly. Test it first! This is a last resort for stains. It is not for odors.
For the best dog urine odor removal hardwood, enzymatic cleaners are usually the top choice. They are safe and effective.
Repairing Dog Urine Damage on Wood Floors
Sometimes, even with the best care, damage happens. Dark stains and warped boards can appear. Do not worry. You can often fix these issues. This section talks about repairing dog urine damage on wood floors.
Minor Stains and Discoloration
If the stain is not too deep, you might fix it yourself. This applies to surface-level stains or very light darkening.
- Light Sanding: Gently sand the stained area. Use fine-grit sandpaper (like 150-grit or 220-grit). Sand just enough to remove the dark top layer. Work with the wood grain. Be careful not to sand too much. This can create a dip.
- Apply Wood Bleach (Optional): If the stain is still there after sanding, you can try wood bleach. This is not the same as laundry bleach. Wood bleach contains oxalic acid. It helps remove iron stains and dark spots. Follow product directions carefully. It can lighten the wood. Apply it only to the stained area. Let it dry. You might need to do this more than once.
- Clean and Dry: After bleaching (if used), clean the area. Wipe off any residue. Make sure it is fully dry. Any moisture can cause problems later.
- Reapply Finish: Put on a new layer of your floor finish. Match the sheen and type as best as you can. Apply a few thin coats. Let each coat dry fully between applications. This feathering technique helps blend the new finish. It makes it less noticeable.
Deep Stains and Warping
If the stain is very dark or the wood is warped, it is a bigger job. These issues might need professional help.
- Board Replacement: For very bad spots, replacing floorboards might be the only way. This is tricky. You need to find matching wood. You also need to remove the old board without harming nearby ones. This job often needs a pro. They have the right tools and skills. They can weave in new boards seamlessly. This way, the floor looks uniform.
- Sanding and Refinishing: If many spots are damaged, or if the floor looks dull, you might need to sand the whole floor. Then you apply a new finish. This makes the whole floor look new. This is a major job. It takes time and skill. You can rent sanders. Or you can hire a professional.
- Process: This involves removing the old finish. Then sanding down the top layer of wood. This removes scratches, dents, and most stains. After sanding, new stain can be applied (if desired). Then several coats of new finish are put on. This creates a fresh, protective surface.
- Considerations: This is messy. It creates a lot of dust. You will need to move furniture. You cannot use the floors for days. But it can save a floor that seems ruined.
Repairing dog urine damage on wood floors can be costly. This is why prevention and quick cleaning are so important. It is always cheaper to prevent a problem than to fix it.
Ongoing Care: Pet-Friendly Floor Maintenance Tips
Keeping your floors nice for years takes regular effort. Good care prevents small problems from becoming big ones. These are general pet-friendly floor maintenance tips. They help protect your floors from all pet-related wear.
- Daily Cleaning:
- Sweep or Vacuum Often: Pet hair, dirt, and dust can scratch floors. Sweep or vacuum daily. Use a soft brush attachment on your vacuum. This prevents scratches. Dirt acts like sandpaper underfoot.
- Wipe Spills Fast: Not just urine. Any liquid spill should be wiped up right away. Water from a dripping bowl or wet paws can also harm wood.
- Regular Floor Cleaning:
- Use Proper Cleaners: Do not use harsh chemicals. Avoid oil soaps or wax polishes on modern finishes. They can leave a sticky film. This film attracts dirt. Use cleaners made for your floor type. They should be pH neutral. Many floor finish makers have their own cleaners.
- Damp Mop, Not Wet: Use a well-wrung mop. Water is not a friend to wood. A damp mop is fine for cleaning. A wet mop can warp the wood. It can also dull the finish. Make sure no standing water is left.
- Protect Against Scratches:
- Trim Pet Nails: Keep your dog’s nails short. Long nails can scratch and dent wood. This is a simple but important step. Clip them every few weeks. If you hear their nails clicking on the floor, they are too long.
- Use Rugs and Mats: Place rugs in high-traffic areas. Put mats near doors and feeding bowls. This protects the floor from dirt, water, and pet wear. It also adds a non-slip surface for your pet.
- Furniture Pads: Put felt pads under furniture legs. Dogs can bump furniture. Moving furniture without pads can scratch your floor.
- Control Moisture:
- Clean Paws: Wipe your dog’s paws when they come inside. This stops dirt and moisture from reaching your floor. Keep a towel by the door.
- Control Humidity: Use a humidifier or dehumidifier. Keep your home’s humidity steady. Big changes can make wood swell or shrink. This leads to gaps or warping. Aim for 35-55% humidity.
- Inspect Floors Often: Look for small scratches or worn spots. Fix them before they get worse. A quick touch-up can save a bigger repair later. Address any issues early.
These pet-friendly floor maintenance tips will help your floors last longer. They will look good too.
Final Thoughts on Protecting Your Hardwood Floors
Protecting your hardwood floors from dog urine is a goal you can reach. It needs a mix of good training, smart product choices, and quick action. Choose durable finishes. Use a good sealant. Train your dog well. Clean up messes very fast. Use enzymatic cleaners for full odor removal. And remember regular maintenance.
By following these steps, you can keep your beautiful wood floors safe. You can enjoy living with your beloved pets. It is all about being prepared and acting fast. Your floors and your nose will thank you.
Frequently Asked Questions (FAQ)
Can I use bleach on dog urine stains on hardwood floors?
No, do not use bleach. Bleach is very harsh. It can strip your floor’s finish. It can also discolor the wood itself. It might make the problem worse by leaving a white spot or damaging the wood grain. Stick to cleaners made for wood floors and enzymatic products.
How quickly does dog urine stain hardwood floors?
Urine can start to stain hardwood floors almost right away. Within minutes, it can begin to seep into the finish. Within hours, it can reach the wood below. The longer it sits, the deeper and darker the stain will be. That is why fast cleanup is so important. Acid and ammonia in urine quickly react with the wood.
Does sealing my floors make them completely urine proof?
No finish or sealant makes a floor 100% urine proof. But a good finish and sealant will make your floors very urine resistant. They create a strong barrier. This barrier gives you more time to clean up spills. It stops urine from soaking into the wood as fast. Think of it as strong protection, not total proofing. Accidents still need quick action.
What if I can smell dog urine but cannot see a stain?
This often means the urine has soaked deep into the wood or subfloor. The smell is from uric acid crystals left behind. You might need a UV black light. Turn off the lights in the room. Shine the UV light close to the floor. Old urine spots will often glow yellow or green. Once you find the spot, clean it well with an enzymatic cleaner. You may need to treat it more than once. The cleaner needs to soak deep to reach the crystals.
Are some types of hardwood floors better for pets?
Yes, some woods are more forgiving. Denser hardwoods like oak, maple, or Brazilian cherry are often more durable. They are less likely to dent or scratch from pet claws. But the finish is still the most important thing. A strong, water-resistant finish matters more than the wood type itself. Engineered hardwood with a durable top layer can also be a good choice. It tends to be more stable against moisture changes. Always check the wood’s hardness rating (Janka scale).